Photorealistic 3D product rendering at scale: from 3D files to product images
How we built a photorealistic 3D product rendering workflow that turns a 3D file and its texture maps into product images at scale, then scores every render for defects.
In fashion, a product image that's almost right is a problem. If the shoe in your render has a slightly wrong toe shape, the customer notices the moment the box arrives. That shows up in your return rate.
That's the wall we hit with one client's shoe. The toe had a very specific shape, and general AI image models kept getting it wrong. Photorealistic 3D product rendering turned out to be the only way to keep the exact geometry and still generate images at scale. We package the approach as a use case: AI images from 3D models.
We recorded a short demo walking through the workflow we built for it. The post below is the companion if you'd rather read or skim. One heads up: this is live R&D, and we're still finalizing parts of it this week.
Why AI gets product geometry wrong
AI image models are good at plausible. Getting the exact product right is where they slip. Ask Nanobanana for a sneaker and you get a sneaker, just not the one your factory actually makes.
For this client, the giveaway was the toe box. The real shoe has a distinct tip, and every generic render softened it into something anonymous. Even from a top view, the part that made the product recognizable was gone. It's the same class of fidelity problem that breaks production AI product pipelines.
In most categories you'd shrug and ship it. In fashion you can't, because the gap between the render and the physical product comes straight back as returns. So we started from the one source that already has the geometry locked in: the 3D file.
The two inputs: a 3D model and texture maps
The workflow needs two things. A 3D model of the product, and its diffuse texture maps. That's the whole input list.
The model goes in as an FBX file, though the workflow also accepts gltf, obj, and stl. The texture map carries the color and surface detail. With those two wired up, the same setup runs across an entire catalogue, which is what makes 3D rendering product images practical at millions of assets instead of one hero shot at a time.
In the editor it shows up as a panel called Refine with a 3D model. You drop the texture map in one slot, the mesh in the other, and describe the product you want back.
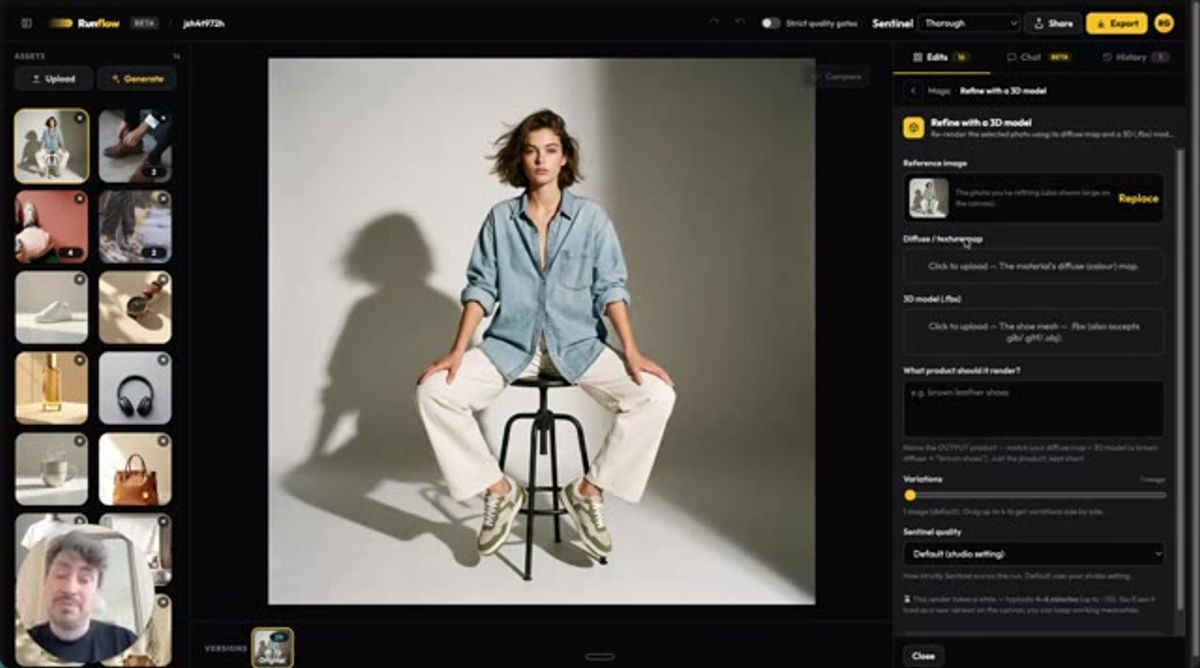
From a 3D file to a photorealistic product image
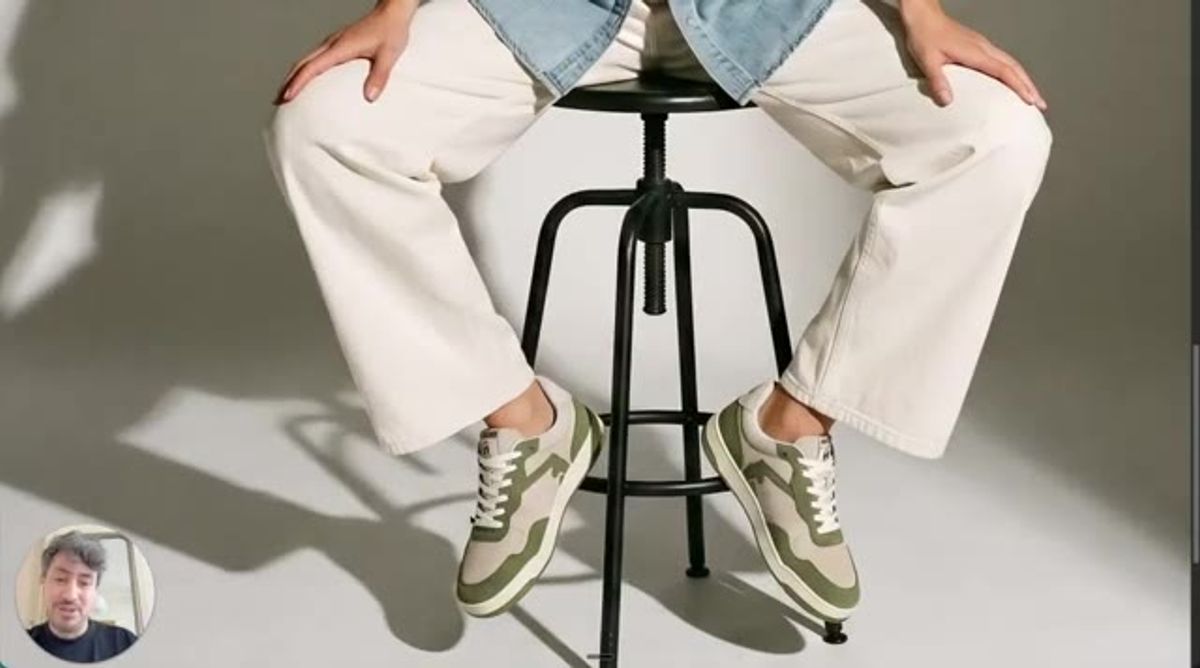
For a concrete example, the demo starts from a top-view stock photo: a pair of brown leather shoes, shot looking straight down. Top view is the honest test here, because that's the angle where the toe shape either reads correctly or it doesn't.
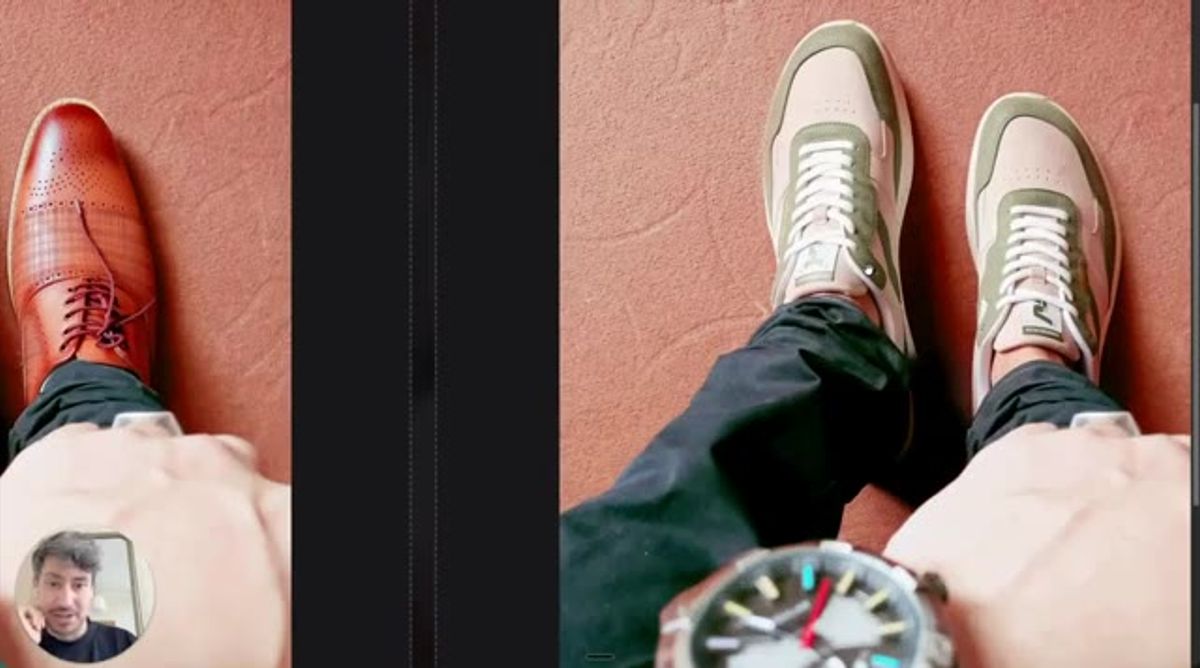
Run it through the workflow and the brown reference becomes the actual product, the green sneaker, with the toe box intact. About a minute and a half into the clip you can slide between the two and check it yourself.
That side-by-side is the point of the whole thing. The geometry holds, and the image is now the shoe the brand actually sells rather than a close cousin of it.
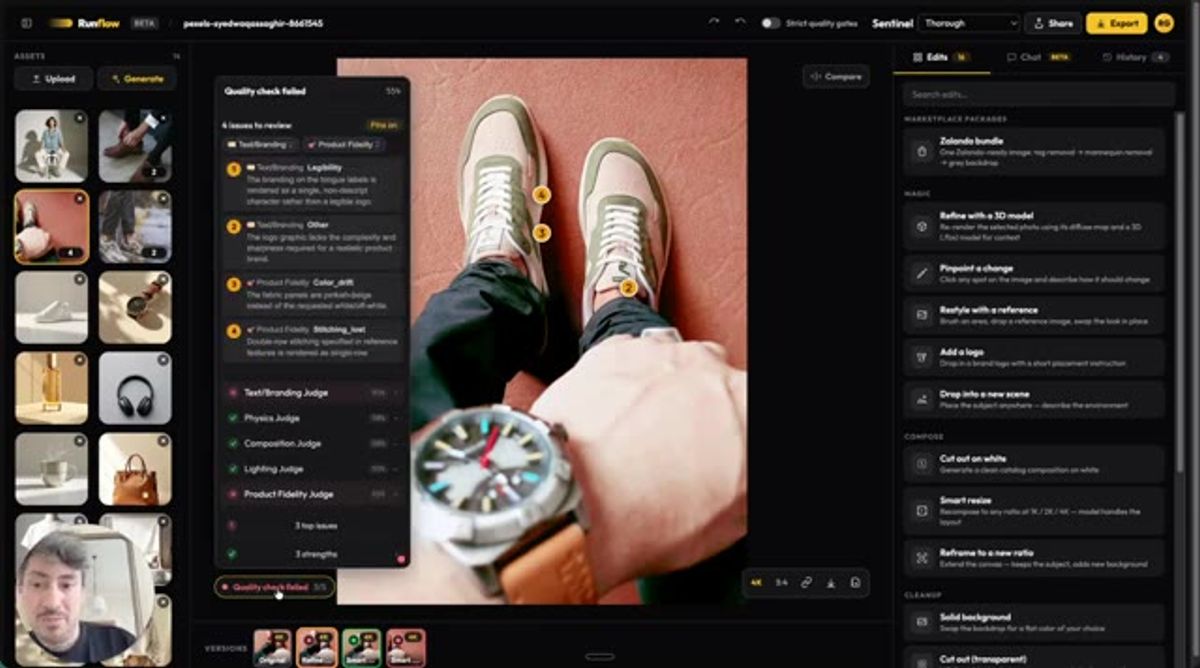
Scoring every render with Sentinel
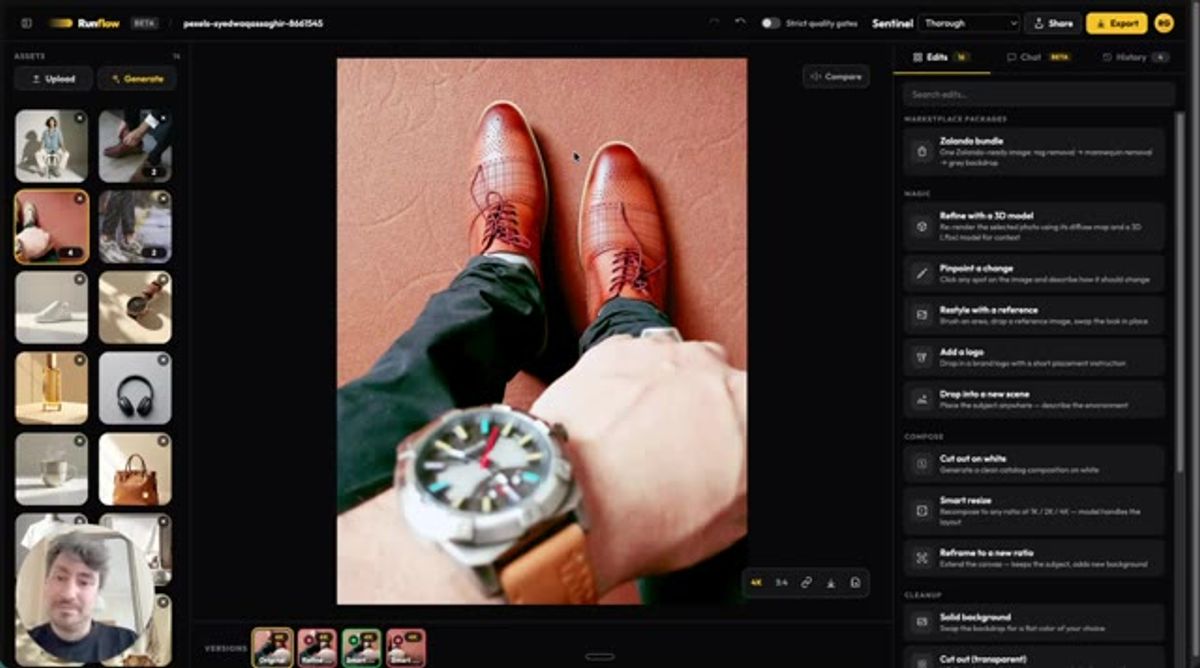
A render that looks fine at a glance can still be wrong in ways that matter. So every output runs through Sentinel, our scoring layer, before we trust it.
On this shoe, Sentinel flagged four issues. The branding on the tongue label rendered as a single blurry character instead of a readable logo. (Mangled brand logos are a problem on their own, and we wrote up how we fix them.) There was a small color drift on the left side. And the double-row stitching from the reference came back as a single row.
None of that jumps out if you're skimming. All of it matters if you're selling the product. Catching it automatically is what lets you run photorealistic 3D product rendering at volume without a person checking every frame by hand.
Rendering any shoe at scale
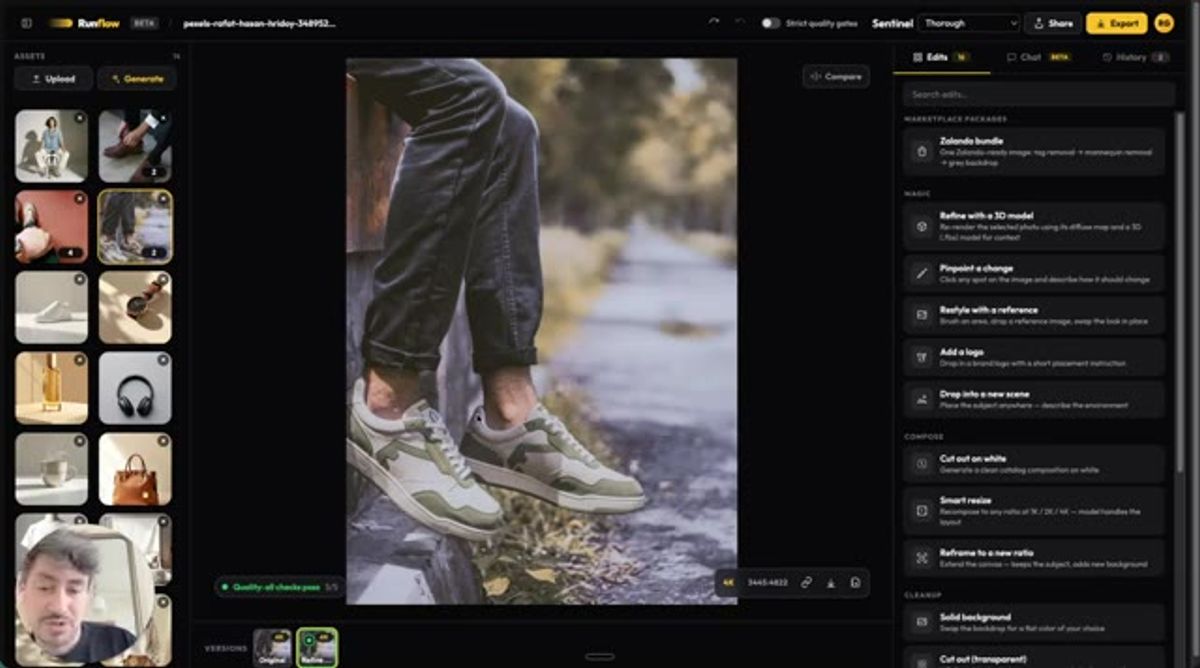
The goal is easy to state and hard to build: take any shoe, start from its 3D model, and get a photorealistic image you can drop on a homepage, a square ad, or a lifestyle scene.
We're close. Later in the demo there's a render that passed every Sentinel check, the sneaker shot outdoors on a curb, and it holds up at full size. The same approach is a real alternative to booking a photographer or paying a studio per asset when you want to use AI for product photography across a full range.
It isn't done yet. We're still fixing the label and stitching cases this week. But the path from a 3D file to a clean product image at scale is working now, and that was the hard part.
Want custom benchmarks for your workload?
We'll run our evaluation pipeline against your production data, for free.
Talk to Founders