Nano Banana product photography: why it fails on shoes (2026)
Nano Banana product photography looks flawless until you zoom in. Here is the reference-tagging trick, the failure that ruins shots, and the fix at scale.
Thirty seconds to generate a product shot. Two more to fall for it. Then you zoom in and your stomach drops.
That gap is the whole story of Nano Banana product photography right now.
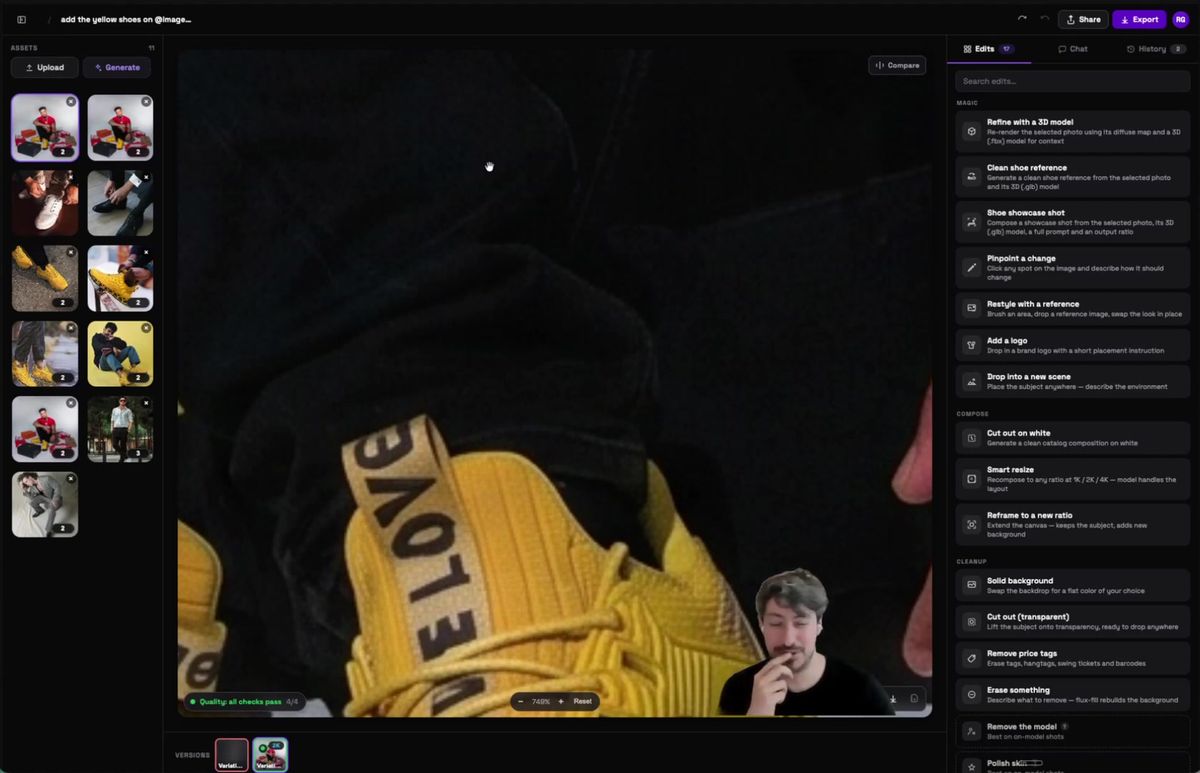
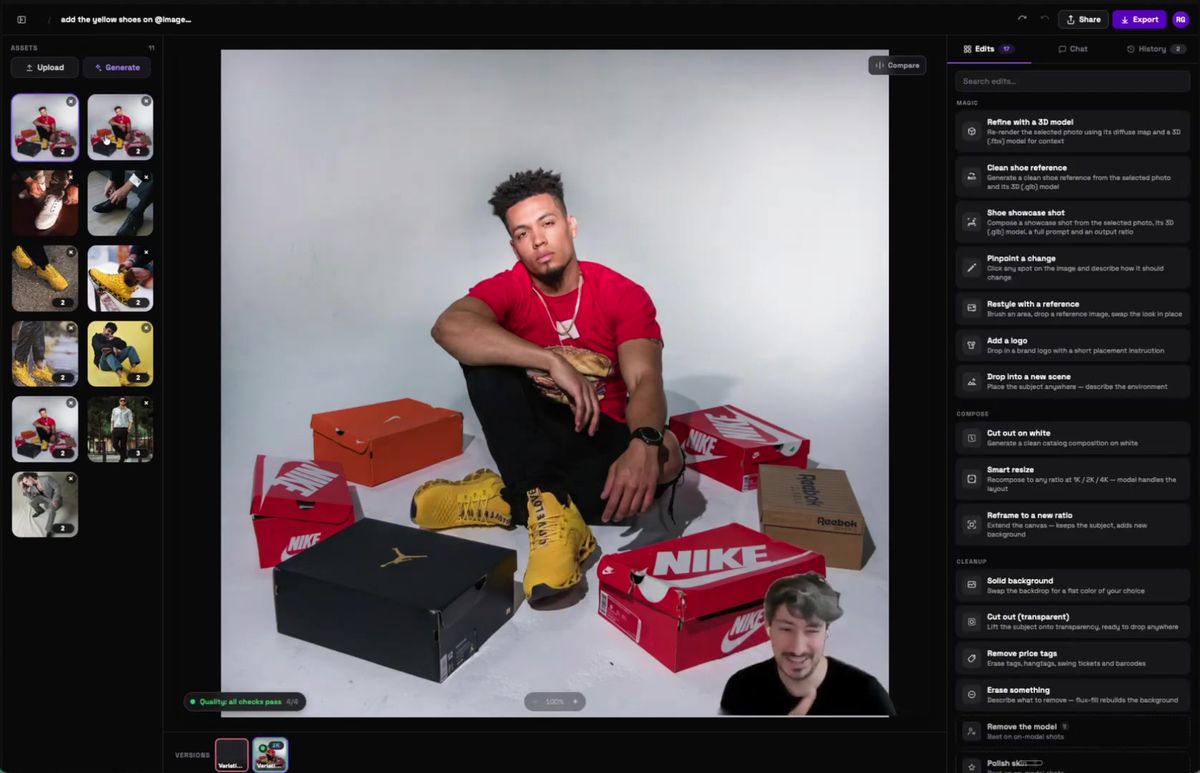
The shot looks like a finished campaign. The model is sitting there, the yellow shoes are on, the lighting is real. You would sign it off in a hurry. Then you read the text on the side of the shoe, and it is running the wrong way.
We make AI product images for brands every week, so we hit this the expensive way. This post is the inside version: the one tagging trick that makes Nano Banana behave, the failure that kills the shot, and what we changed so it stops happening across hundreds of products.
The reference-tagging trick most Nano Banana users skip
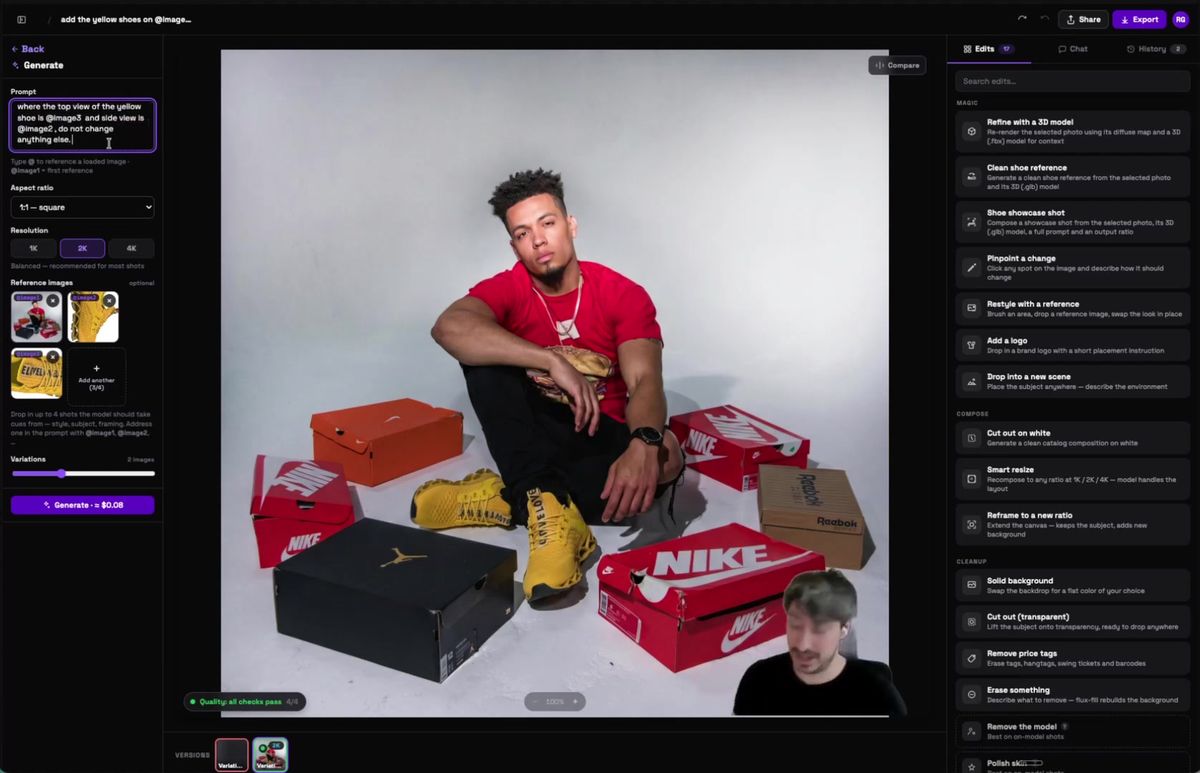
Tag each reference image by its role, then tell the model what not to touch. Most people drop one photo in and hope. The cleaner way is to load every angle you have and label it.
In our editor that looks like three references. Image 1 is the base photo you want the shoe added to. Image 2 is the side view of the shoe. Image 3 is the top view. The prompt then reads like an instruction, not a wish: "the top view of the yellow shoe is image 3, the side view is image 2, do not change anything else."
Most brands do not even have a top view of their own product. That is fine. The point is to give the model every angle that exists so it has a fair reference to work from, instead of inventing the parts it cannot see.
It costs you thirty seconds of setup. It saves you the reshoot.
What Nano Banana gives you, and why it looks fine
On the first pass the output is clean and believable, which is exactly the problem. You hit generate, the result comes back, and every quick check passes.
You glance at it. You see the yellow shoe in the frame. The color is roughly right. The side reads something like "E level". Great, you think, the photoshoot worked.
This is the moment that fools teams. The shot is 90% correct, and 90% correct reads as done when you are moving fast. Nobody zooms in on a render that already looks like a catalog page.
Where Nano Banana quietly breaks on products
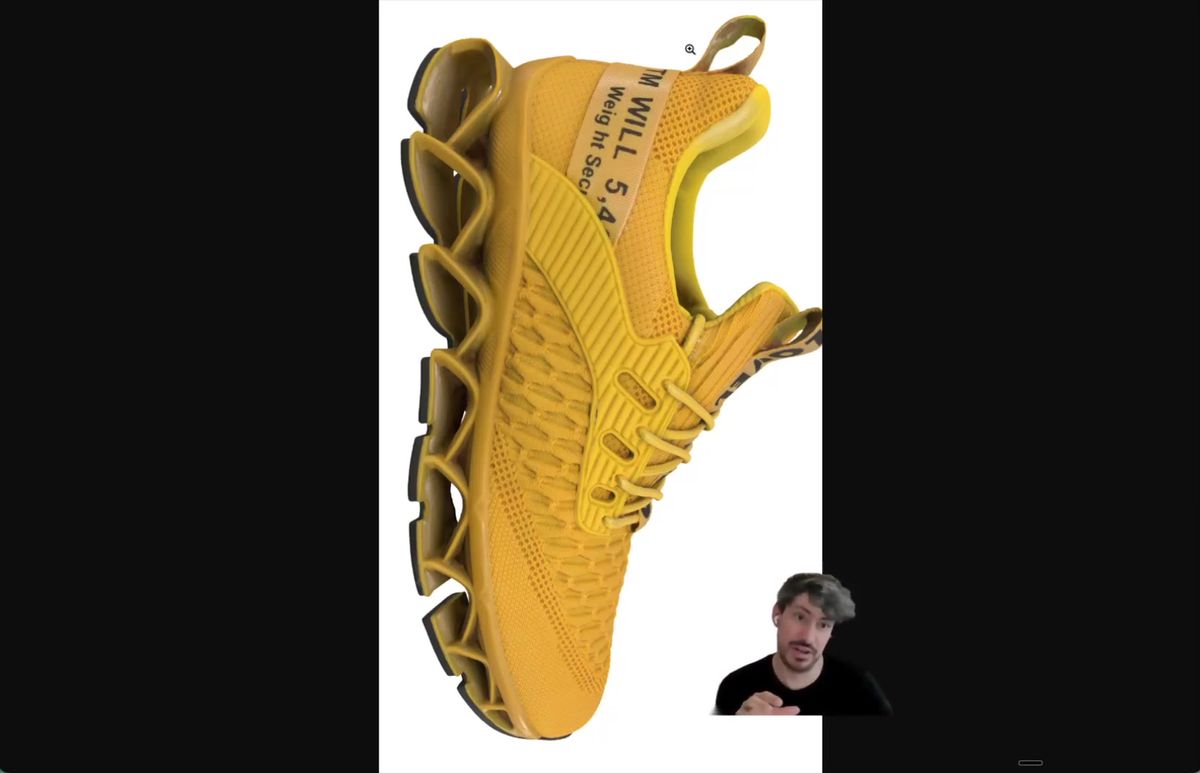
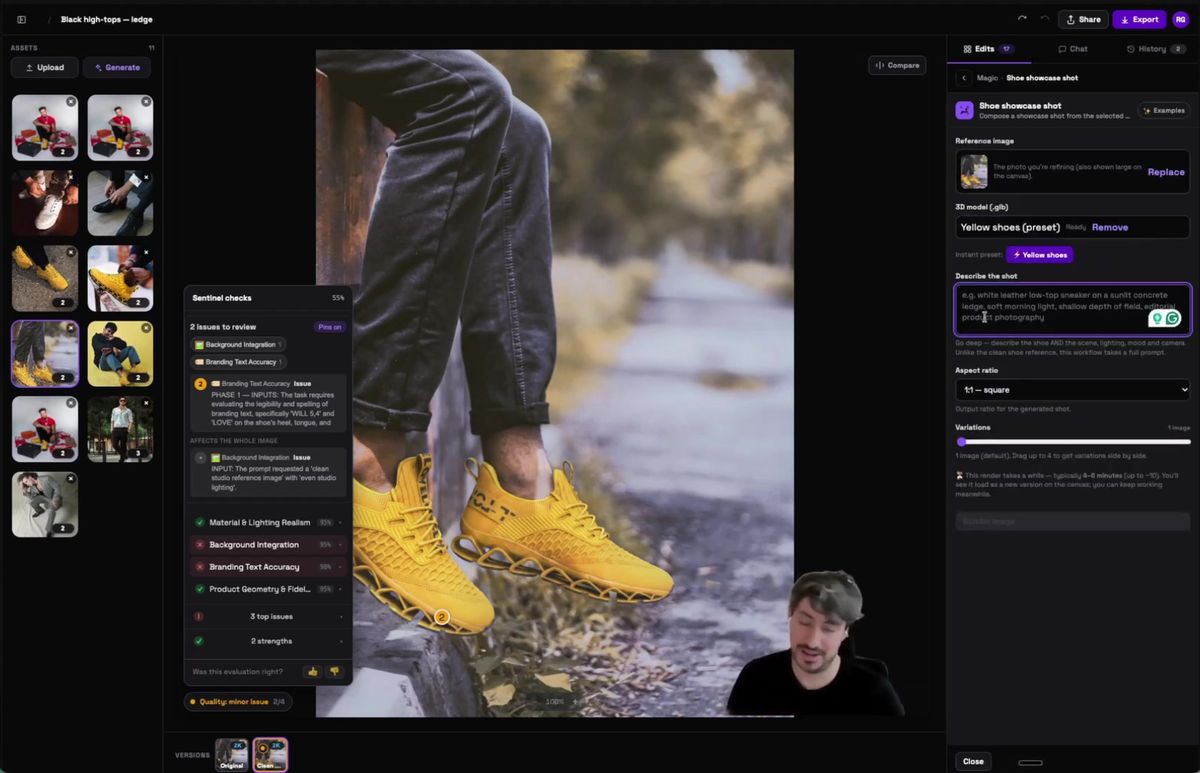
The thing it gets wrong is text and orientation, and you will not catch it until someone points at it. Zoom into the shoe and the letters are off. That part you can almost forgive.
The real miss is direction. The text on this shoe, "E LOVE", is meant to run top to bottom. Nano Banana flipped it so it climbs upward instead. The letters are there, the word is almost readable, and the whole thing is wrong.
Here is the rule we use now: if a human cannot cleanly read the text in your reference, the model cannot either. It will guess, and a guess on a logo is how you ship a shoe that no real store would sell. We wrote up the same failure on apparel in how to fix AI-mangled brand logos on garments.
Why a "good enough" shot is still a hard pass
One reversed logo is a problem across a whole catalog when you are shooting hundreds of products. At a single shoot, you catch it. You squint, you spot it, you regenerate.
At three hundred products, you do not.
That is the math that keeps brands off AI for real catalogs. A wrong image is a returned order, a confused customer, and a brand that looks careless on its own product page. The technology demos beautifully on one shoe. It falls over the moment volume removes the human who was checking each frame.
So the question is not whether Nano Banana can make one great product shot. It can. The question is whether you can trust the next three hundred without looking at them.

The fix: feed reliable data, not a flat photo
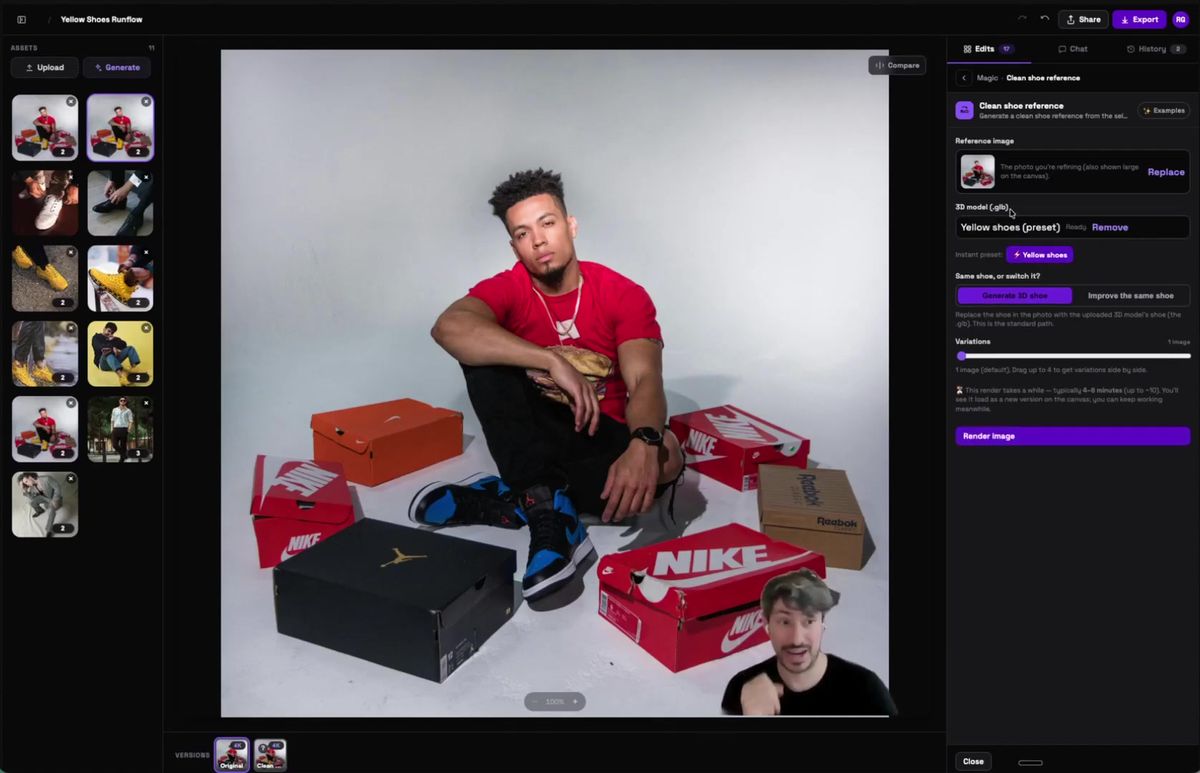
Ground the edit in a 3D model of the product so the geometry and the text come from the real object. A single photo gives the model a hint. A 3D file gives it the truth.
We run the same input through a workflow with a 3D preset, a .glb or .fbx of the shoe. The "Refine with a 3D model" step re-renders the photo using the product's actual diffuse map and geometry, so the model is not inventing the parts it cannot see. It is reading them.
The difference is immediate. The yellow now matches the real shoe instead of drifting a few shades off. And "E LOVE" runs the right way, top to bottom, because the text came from the model and not from a guess. That is the version you can put on a product page.
This is the same approach we broke down in turning 3D files into photorealistic product photos and in how we turn 3D files into product images at scale.
Catching the errors you cannot eyeball
At volume you need a check that flags the bad frame before it ships, not a person squinting at every render. The 3D model fixes the input. The quality pass fixes the output.
Every render runs through a set of checks that look at the image and call out what is off. Something wrong on the bottom of the shoe, a logo that reads backwards, a color that drifted. The system marks it, you fix that one, and the rest move on. The little "checks pass" badge in the corner is doing the job a tired human used to do at 11pm before a launch.
That is the half nobody talks about. Reliable images at scale need reliable data going in and an automatic check on the way out. Skip either one and you are back to manual review, which does not survive past a few dozen products. We tested where these checks matter most in the failure modes that kill production AI product isolation.
Running this from one shoot to thousands
Once the workflow is right, you call it as an API and the same logic runs on every product without a person in the loop. The demo above is a UI. The thing that scales is the endpoint behind it.
The shape is simple: POST your inputs to the model's run endpoint, then poll for the result.
curl -X POST https://api.runflow.io/v1/models/google/nano-banana-pro/runs \
  -H "Authorization: Bearer rf_live_your_key" \
  -H "Content-Type: application/json" \
  -d '{
    "input": {
      "prompt": "place the yellow shoe on the model, keep the logo orientation exactly as the reference, do not change anything else",
      "image_urls": [
        "https://yourapp.com/base.jpg",
        "https://yourapp.com/shoe-side.jpg",
        "https://yourapp.com/shoe-top.jpg"
      ]
    }
  }'
You get back a run ID. Poll it until the status is finished:
curl https://api.runflow.io/v1/runs/RUN_ID \
  -H "Authorization: Bearer rf_live_your_key"
You pay a simple fixed price per call, and you do not need to keep a GPU team warm to make it run. The model surface, including the Pro and edit variants, lives on the Nano Banana run page. If your real workflow is more than one model call, the 3D step plus the QA step plus the edit, you can ship the whole graph as one endpoint with ComfyUI Deploy. The full path from a ComfyUI test to production is in run the Nano Banana API, then take it to production.
Raw Nano Banana vs a 3D-grounded workflow
The difference is not the model. It is what you feed it and what you check on the way out.
| Raw single-photo edit | 3D-grounded workflow | |
|---|---|---|
| Color accuracy | Drifts a few shades | Matches the real product |
| Logo and text orientation | Guessed, often flipped | Read from the 3D model |
| Catching a bad frame | Manual, by eye | Automatic quality checks |
| Works at one shoot | Yes | Yes |
| Works at one thousand | No | Yes |
Frequently asked questions
Can Nano Banana do product photography?
Yes, for a single shot it is very good. The trouble shows up at volume and on fine detail like logos and text, where it tends to guess and sometimes flips the orientation. For a catalog you want a workflow that grounds the edit in real product data and checks every output.
Why does Nano Banana flip text and logos on products?
The model works from a flat reference image. When the text is small or partly hidden, it reconstructs what it thinks should be there instead of copying the exact letters and direction. If a human cannot clearly read the text in your reference, the model usually cannot either.
What is the image-tagging trick?
You load each reference photo and label it by role, then point the prompt at the labels. For example, image 1 is the base photo, image 2 is the side view, image 3 is the top view, and the prompt says which is which and what to leave alone. It gives the model every angle that exists instead of letting it invent the parts it cannot see.
How do I fix the color being slightly off?
Feed a 3D model of the product so the render reads the actual diffuse map instead of sampling color from one photo. The "refine with a 3D model" step pulls the real material, so the yellow stays the same yellow across every shot.
Do I need a 3D file for every product?
For high-volume catalogs it pays off fast, because the 3D file fixes color, geometry, and text in one pass. For a one-off shot you can often get away with good reference tagging alone. The more products you run, the more a 3D source earns its place.
How do I check AI product images at scale?
Run every render through automatic quality checks that flag the bad frames, then only review the ones that fail. Reviewing every image by eye stops working past a few dozen products, which is where most AI photoshoot projects quietly die.
Is this cheaper than a real photoshoot?
For a large catalog, yes, once the workflow is set up. You skip the studio, the reshoots, and the per-product cost drops sharply. The setup work is the 3D source and the checks, and that is the part that makes the savings hold.
Can I call this as an API?
Yes. POST your prompt and reference images to the model's run endpoint and poll the run ID for the result. The same code runs the same workflow on one product or one thousand, with simple fixed pricing per call.
Which model should I use for product shots?
Start with Nano Banana for identity-preserving edits, since that is its strength. Then ground it with a 3D source and add the quality pass. The model matters less than the data you give it and the check you run after.
Where to go next
You have both halves now: the tagging trick that makes Nano Banana behave, and the 3D-plus-QA workflow that makes it survive a real catalog. Here is the order that works.
- Tag your references by role and tell the model what not to touch.
- Generate, then zoom in on every logo and line of text before you trust the shot.
- For anything you sell, ground the edit in a 3D file so color and text come from the real product. See turning 3D files into photorealistic product photos.
- Add an automatic quality check so a bad frame gets flagged, not shipped.
- Test the model on your own products on the Nano Banana run page.
- When the volume is real, ship the whole workflow as one endpoint with ComfyUI Deploy.
Start free at runflow.io.
Want custom benchmarks for your workload?
We'll run our evaluation pipeline against your production data, for free.
Talk to Founders