ComfyUI upscale workflow: Flux restore and sharpen in 2026
A ComfyUI upscale workflow built on Flux dev plus ControlNet-Upscaler that restores and sharpens blurry images, then how to run that same pipeline as an API at scale.
A soft, washed-out photo of a girl in a wooden house. Broken details. Blurry edges. Thirty seconds later it has individual strands of hair, the sky reflected inside a single eye, and the texture of leather on a sofa nobody could see before.
That is what a good ComfyUI upscale workflow does, and the gap between "upscale" and "restore and sharpen" is the whole story here.
Most people think upscaling means making an image bigger. It does not. A nearest-neighbor or Lanczos resize makes the same blur bigger. What you actually want is a model that resamples the image, invents plausible detail where detail was lost, and keeps the composition intact. That is a generative job, not a math job. And the workflow FutuTek published does it on Flux dev with a ControlNet-Upscaler model holding the structure in place.
I rebuilt this graph because we hit the exact problem it solves. Customers send us product photos that are 640 pixels wide, shot on a phone in 2019, and they expect a crisp hero image out the other end. A plain resize gets you a bigger bad photo. This is the pipeline that does not. Here is how it works, then the part that matters once you need it to run a thousand times a day.
What a ComfyUI upscale workflow actually does
A real ComfyUI upscale workflow resamples the image through a diffusion model so it adds believable detail, not just pixels. The resize is the easy half. The hard half is restoration: fixing the blur, recovering edges, and enhancing color and texture without inventing a different person.
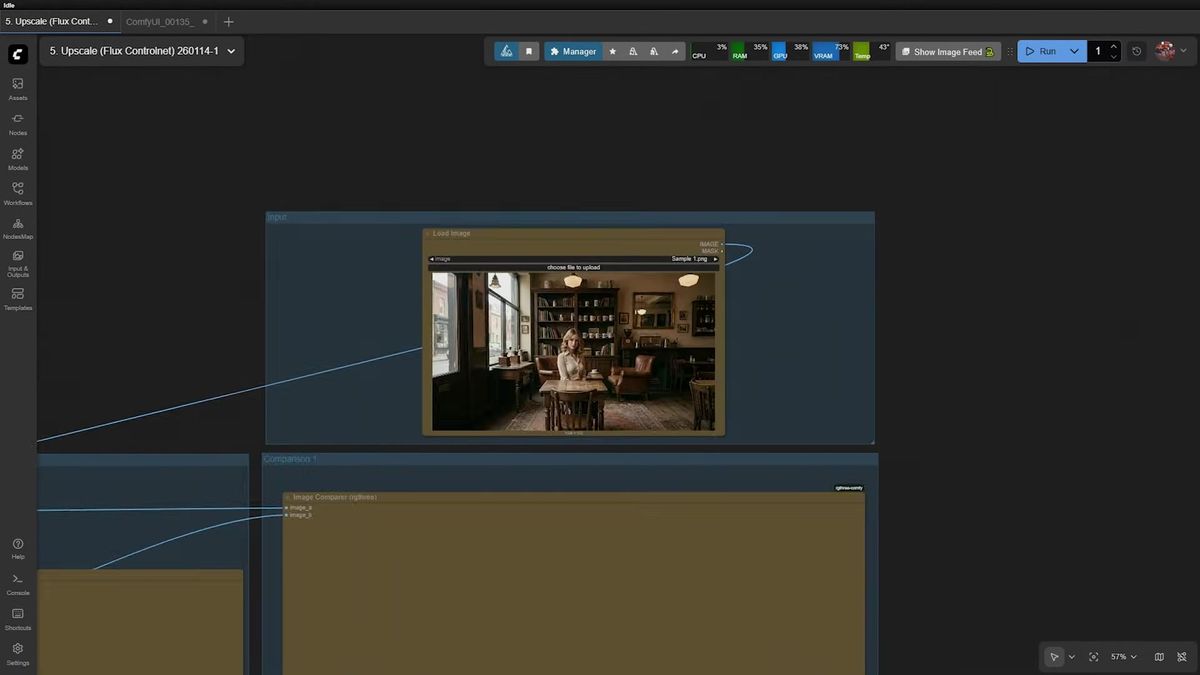
The input in the FutuTek workflow is a low-resolution image of a girl sitting in a wooden house. It is soft and washed out. Before anything touches it, there is a small bit of prep that most tutorials skip: crop about half the frame horizontally to balance the composition, then resize to a standard 1920×1080 canvas. You feed that into the graph, not the raw file.
That prep step matters more than it looks. A diffusion upscaler has a target resolution it works best at. Hand it a weird aspect ratio or a tiny canvas and you get warping and seams. Normalizing the input to a known size first is the difference between a clean result and a melted one.
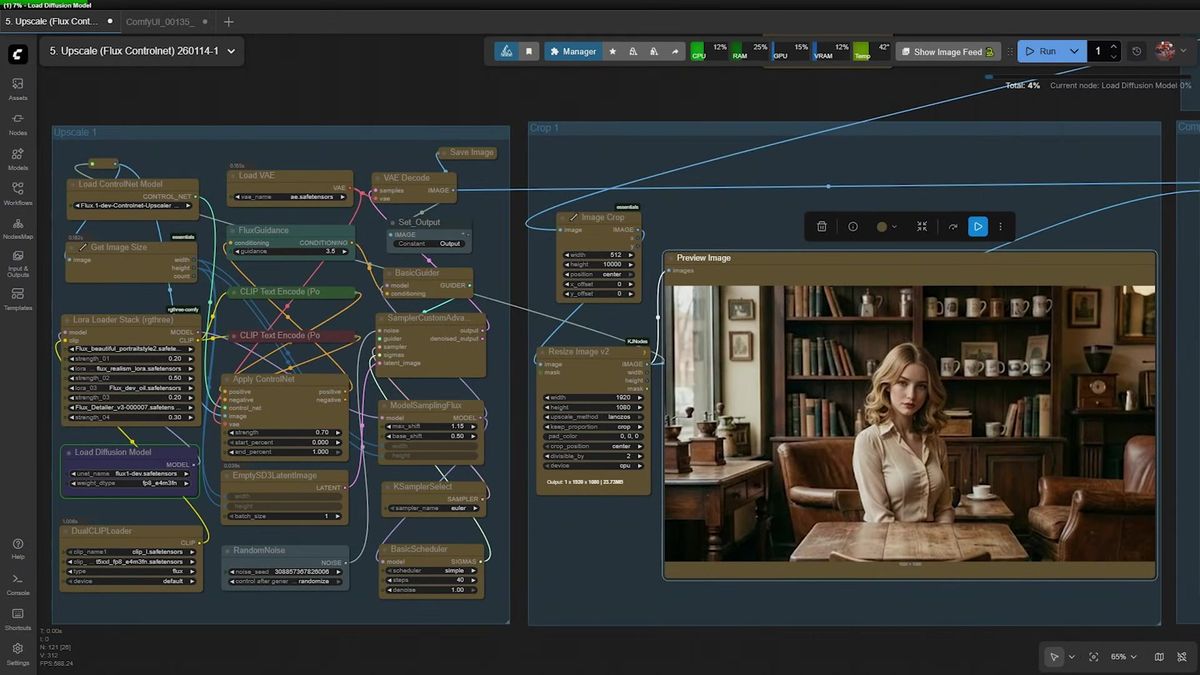
The model stack: Flux dev plus ControlNet-Upscaler
The engine is Flux1-dev for generation and a ControlNet-Upscaler model to pin the original structure so the upscale stays faithful. Flux invents the new detail. The ControlNet keeps that invention anchored to the photo you started with, so the girl is still the same girl and the room is still the same room.
This is the part that separates a restore from a re-roll. Without structural conditioning, a generative upscaler will happily redraw the scene into something prettier and wrong. The ControlNet-Upscaler reads the low-res input as a control signal and tells Flux: add detail here, but do not move the furniture.
After about 30 seconds of sampling on this stack, you get the final image. Thirty seconds is not free, and we will come back to that number, because it is the one that decides whether this workflow is a hobby or a product.
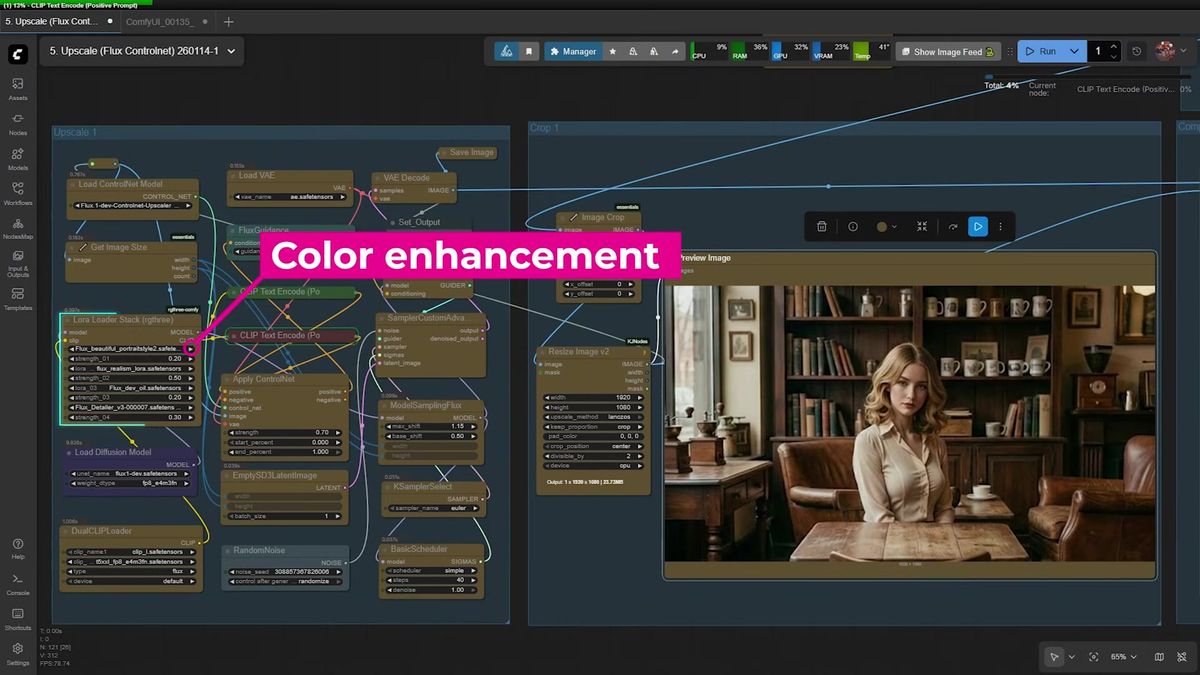
LoRAs are where the polish comes from
The restoration quality comes from stacking four Flux LoRAs, each fixing a different failure mode of a blurry photo. This is the lever most people miss. The base model upscales. The LoRAs decide whether it looks real.
The stack in this workflow:
| LoRA | What it fixes |
|---|---|
| Beautiful Portrait | Color balance and overall portrait quality |
| Realism | Natural look, kills the plastic AI sheen |
| Dev_oil | Smooths and refines skin without over-blurring |
| Detailer | Pulls back fine detail: hair strands, eyelashes, fabric weave |
Each LoRA is a small weight file you load in series before the sampler. Turn them all on and the output reads as a real photograph. Turn them off and you get a clean but flat upscale that still looks AI-touched. The combination is the recipe, and it is worth tuning the weights per image type. Portraits want more Dev_oil and Detailer. Product shots want less skin smoothing and more Realism.
(We learned this the expensive way: a skin-smoothing LoRA cranked too high turns a product label into a smudge. The settings that flatter a face destroy text on packaging.)
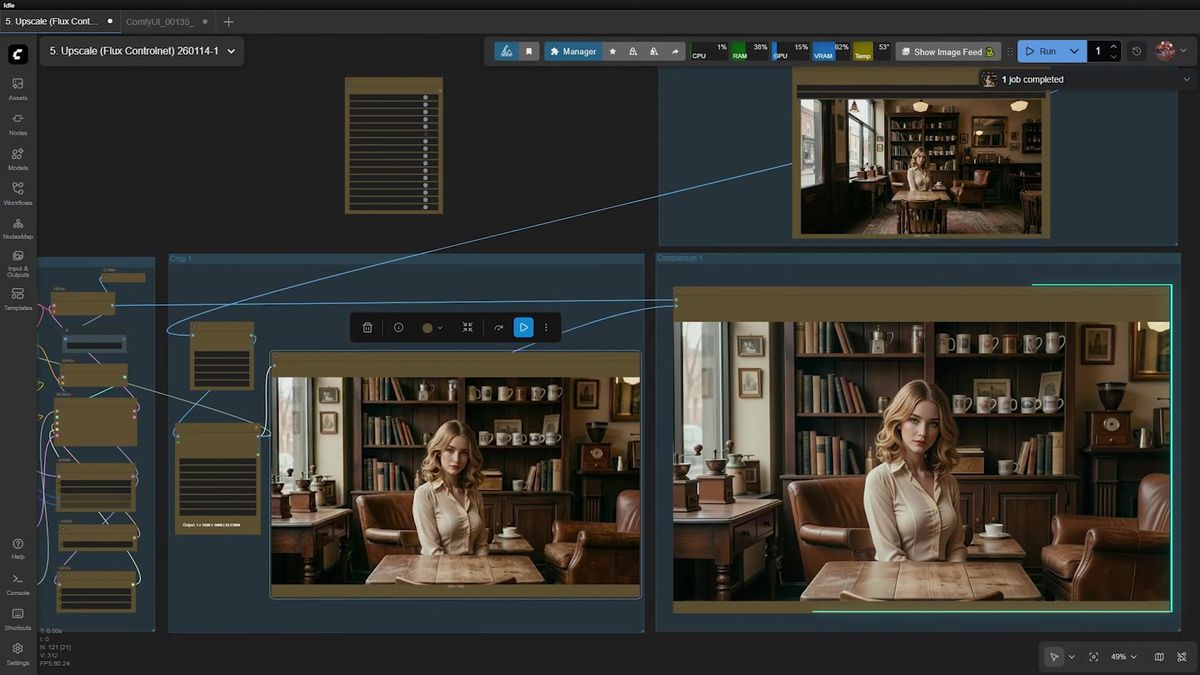
Proof: the before-and-after comparison
An Image Comparer node puts the cropped original next to the upscaled result so you can verify the restoration instead of trusting it. Always build this into an upscale graph. The whole point is fidelity, and the only honest way to judge fidelity is side by side at full zoom.
In the comparison, the left frame is the soft cropped input. The right is the output. The resolution jump is dramatic and, more importantly, there are no artifacts. You can read individual strands of hair, clear bright eyes, smooth skin, and rich color. The patterns on each cup in the cabinet are visible. The leather on the sofa looks freshly reupholstered. None of that detail existed in the input. The model put it there, plausibly, and the ControlNet kept it locked to the original layout.
This is the test that matters for production too. If your upscaler invents detail that contradicts the source, you do not have a restorer, you have a hallucinator. The comparison node is your gate.
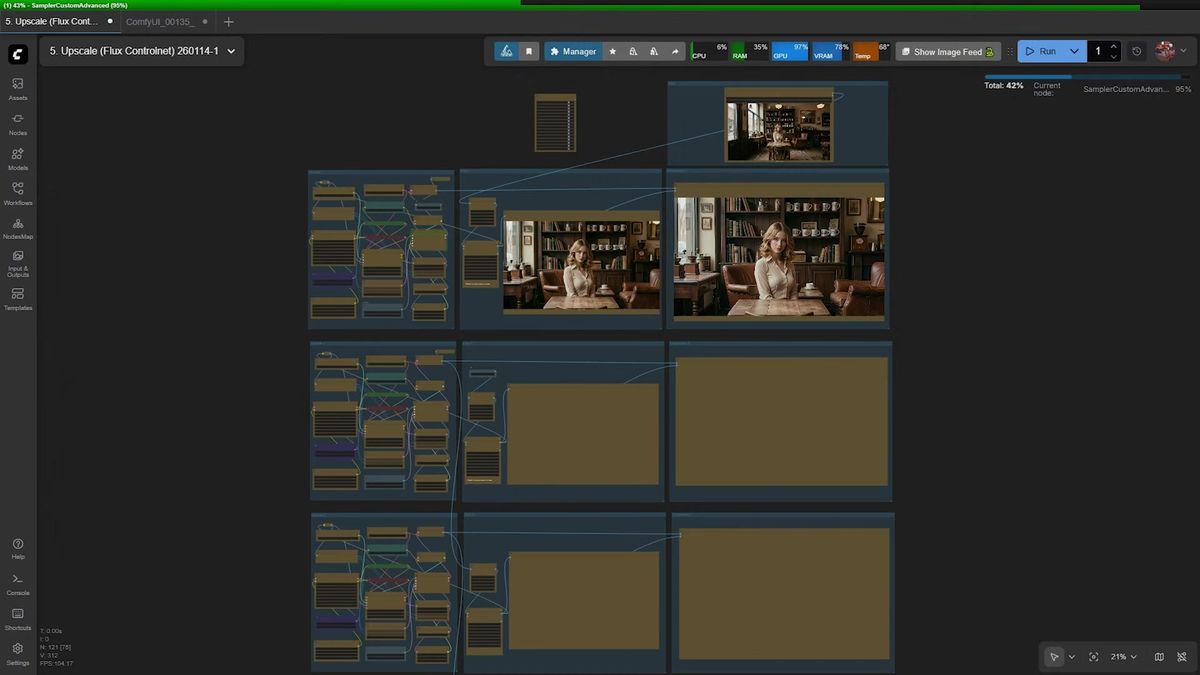
The tile-chain trick: zoom further than the source allows
Chaining the workflow into itself, feeding each output as the next input, lets you keep cropping and upscaling until you can zoom far past the original resolution. This is the clever bit, and it is just composition.
You copy the workflow downward. The output of the upper graph becomes the input of the next. Each stage crops tighter and upscales again: start on the wide scene, focus on the girl, crop into her face, zoom into her eyes, and finally into a single eye. Because every stage regenerates detail at its new crop, you are not enlarging existing pixels. You are synthesizing fresh detail at each level of zoom.
The end result is absurd in the best way. From a blurry, low-resolution photo, you can zoom in far enough to see the sky reflected inside her eye. No single upscale pass gets you there. The chain does, because each link only has to do a modest 2x or 4x job on a crop it can handle well.
There is a cost to this, and it is linear. Five stages of chaining is five Flux runs, five times the 30-second sampler cost, five times the GPU time. On one machine, doing this for one image is a coffee break. Doing it for a catalog of ten thousand product shots is a planning problem. Hold that thought.
What changes when you run this upscale workflow at scale
The workflow that takes 30 seconds on your idle 4090 becomes an infrastructure problem the moment real traffic hits it, and that is the gap between a tutorial and a product. This is the part FutuTek's video, like every good ComfyUI tutorial, does not cover, because it is not the tutorial's job. It is ours.
Here is the math that bites. One image, one upscale pass, 30 seconds of sampler time. Add the four LoRAs and the ControlNet load and call it 40 seconds end to end on a warm machine. Now chain it five times for a deep-zoom result and you are at three minutes per image. Now imagine a hundred users hitting that at once. One GPU serializes them: user one waits 3 minutes, user one hundred waits 5 hours. (We have run that math for customers. It does not end well for one machine.)
Scaling it yourself means a job queue, a pool of GPU workers, model and LoRA weights pre-loaded so you are not paying a cold-start download on every run, retries when a worker dies mid-sample, and autoscaling so you are not renting twenty idle GPUs overnight. That is a real backend, and standing it up is weeks of work before you ship a single upscaled image to a customer.
The alternative is to take the exact same workflow and run it as an API. You export the ComfyUI graph, deploy it once, and call it over HTTP. Same Flux dev, same ControlNet-Upscaler, same LoRA stack, no GPU to babysit. That is what Runflow's ComfyUI deploy is for: you bring the workflow, we run it on warm GPUs and hand you an endpoint. The chain-of-five becomes five API calls you fan out in parallel, and the user who would have waited five hours waits the length of one pass.
The cost story is the honest part of the pitch. Running your own GPU fleet for spiky image work means paying for capacity you mostly do not use. We built our infrastructure to run this kind of job about 70% cheaper than standing up an in-house GPU team and the DevOps around it, and you get reliability you would otherwise have to engineer yourself. No AI team required. Simple fixed pricing per call.
Running the upscale as an API
Once the workflow is deployed, an upscale is one POST to start a run and one GET to poll for the result. You hand it the source image and your settings, you get back the upscaled output.
# Start an upscale run
curl -X POST https://api.runflow.io/v1/models/{owner}/{slug}/runs \
  -H "Authorization: Bearer $RUNFLOW_API_KEY" \
  -H "Content-Type: application/json" \
  -d '{
    "input": {
      "image_url": "https://example.com/low-res-input.jpg",
      "upscale_factor": 4
    }
  }'

# Poll until it is done
curl https://api.runflow.io/v1/runs/{run_id} \
  -H "Authorization: Bearer $RUNFLOW_API_KEY"
The tile-chain zoom maps cleanly onto this. Run the first upscale, take the output URL, crop it, feed it as the input to the next run. Five chained POSTs, each one a stage. You orchestrate the cropping in your own code and let the API do the heavy generative work. For the broader pattern of wrapping a graph as an endpoint, the ComfyUI API developer guide walks through the full request and polling shape, and the production-ready ComfyUI workflows post covers the graphs worth deploying first.
If you would rather start from a hosted model than deploy your own graph, the upscaler and Flux models live in the Runflow model catalog, and the broader image API covers the surrounding jobs: background removal, resize, format conversion, the boring glue you need around an upscaler in a real pipeline.
Frequently asked questions
What is the best upscale model for ComfyUI in 2026?
For photo restoration, a Flux dev base paired with a ControlNet-Upscaler model gives the best balance of added detail and structural fidelity. Pure ESRGAN-family upscalers (4x-UltraSharp, RealESRGAN) are faster and fine for clean line art or screenshots, but they do not restore lost detail in soft photos the way a diffusion upscaler does.
What does the ControlNet-Upscaler model do?
It reads your low-resolution input as a control signal and constrains Flux to add detail without changing the composition. Without it, a generative upscaler tends to redraw the scene into something sharper but different. The ControlNet keeps the upscale faithful to the original.
Why crop and resize the input before upscaling?
Diffusion upscalers work best at a known target resolution and aspect ratio. Normalizing the input to a standard size, such as 1920×1080, before the workflow avoids warping and seams. Feeding a tiny or oddly shaped canvas straight in is a common cause of melted results.
What do the four Flux LoRAs add?
Each fixes a different flaw in a blurry photo. Beautiful Portrait improves color, Realism removes the plastic AI look, Dev_oil refines skin, and Detailer recovers fine texture like hair and fabric. The base model upscales; the LoRAs decide whether the result reads as a real photograph.
How does the tile-chain zoom work?
You copy the workflow so each stage's output becomes the next stage's input, cropping tighter each time. Because every stage regenerates detail at its new crop instead of enlarging existing pixels, you can zoom far past the original resolution. The trade-off is cost: five stages is five full runs.
How long does one upscale take?
About 30 seconds of sampler time on a warm consumer GPU, closer to 40 seconds end to end with the LoRA and ControlNet loads. A five-stage chain is roughly three minutes per image. Those numbers are per machine, which is why scale needs a worker pool.
Can I run this upscale workflow as an API?
Yes. Export the ComfyUI graph and deploy it as an endpoint. You then start an upscale with a POST and poll a run ID for the result, with the same Flux dev, ControlNet-Upscaler, and LoRA stack running on managed GPUs instead of your own.
Is it cheaper to self-host or use a hosted upscale API?
For steady high volume on hardware you already own, self-hosting can win. For spiky or bursty image work, a hosted API is usually cheaper because you do not pay for idle GPU capacity. We run this class of job about 70% cheaper than an equivalent in-house GPU setup once you count the DevOps.
Where to go next
- Watch the FutuTek video above to see the one-click Flux upscale, restore, and sharpen workflow run end to end.
- Rebuild the graph: Flux dev base, ControlNet-Upscaler, and the four-LoRA stack (Beautiful Portrait, Realism, Dev_oil, Detailer), with an Image Comparer node to check fidelity.
- Prep your inputs properly: crop for balance and resize to a standard canvas before the workflow, not after.
- Try the tile-chain trick on one image to see how far the deep zoom can go before you commit it to a batch.
- Read the ComfyUI API developer guide for the full request-and-poll pattern, and the production-ready ComfyUI workflows post for the graphs worth deploying first.
- Browse the model catalog and image API for the upscaler plus the surrounding jobs (background removal, resize) you need in a real pipeline.
- When you are ready to run this at volume, deploy the graph with Runflow's ComfyUI deploy and let warm GPUs handle the load. Start free at runflow.io.
Want custom benchmarks for your workload?
We'll run our evaluation pipeline against your production data, for free.
Talk to Founders